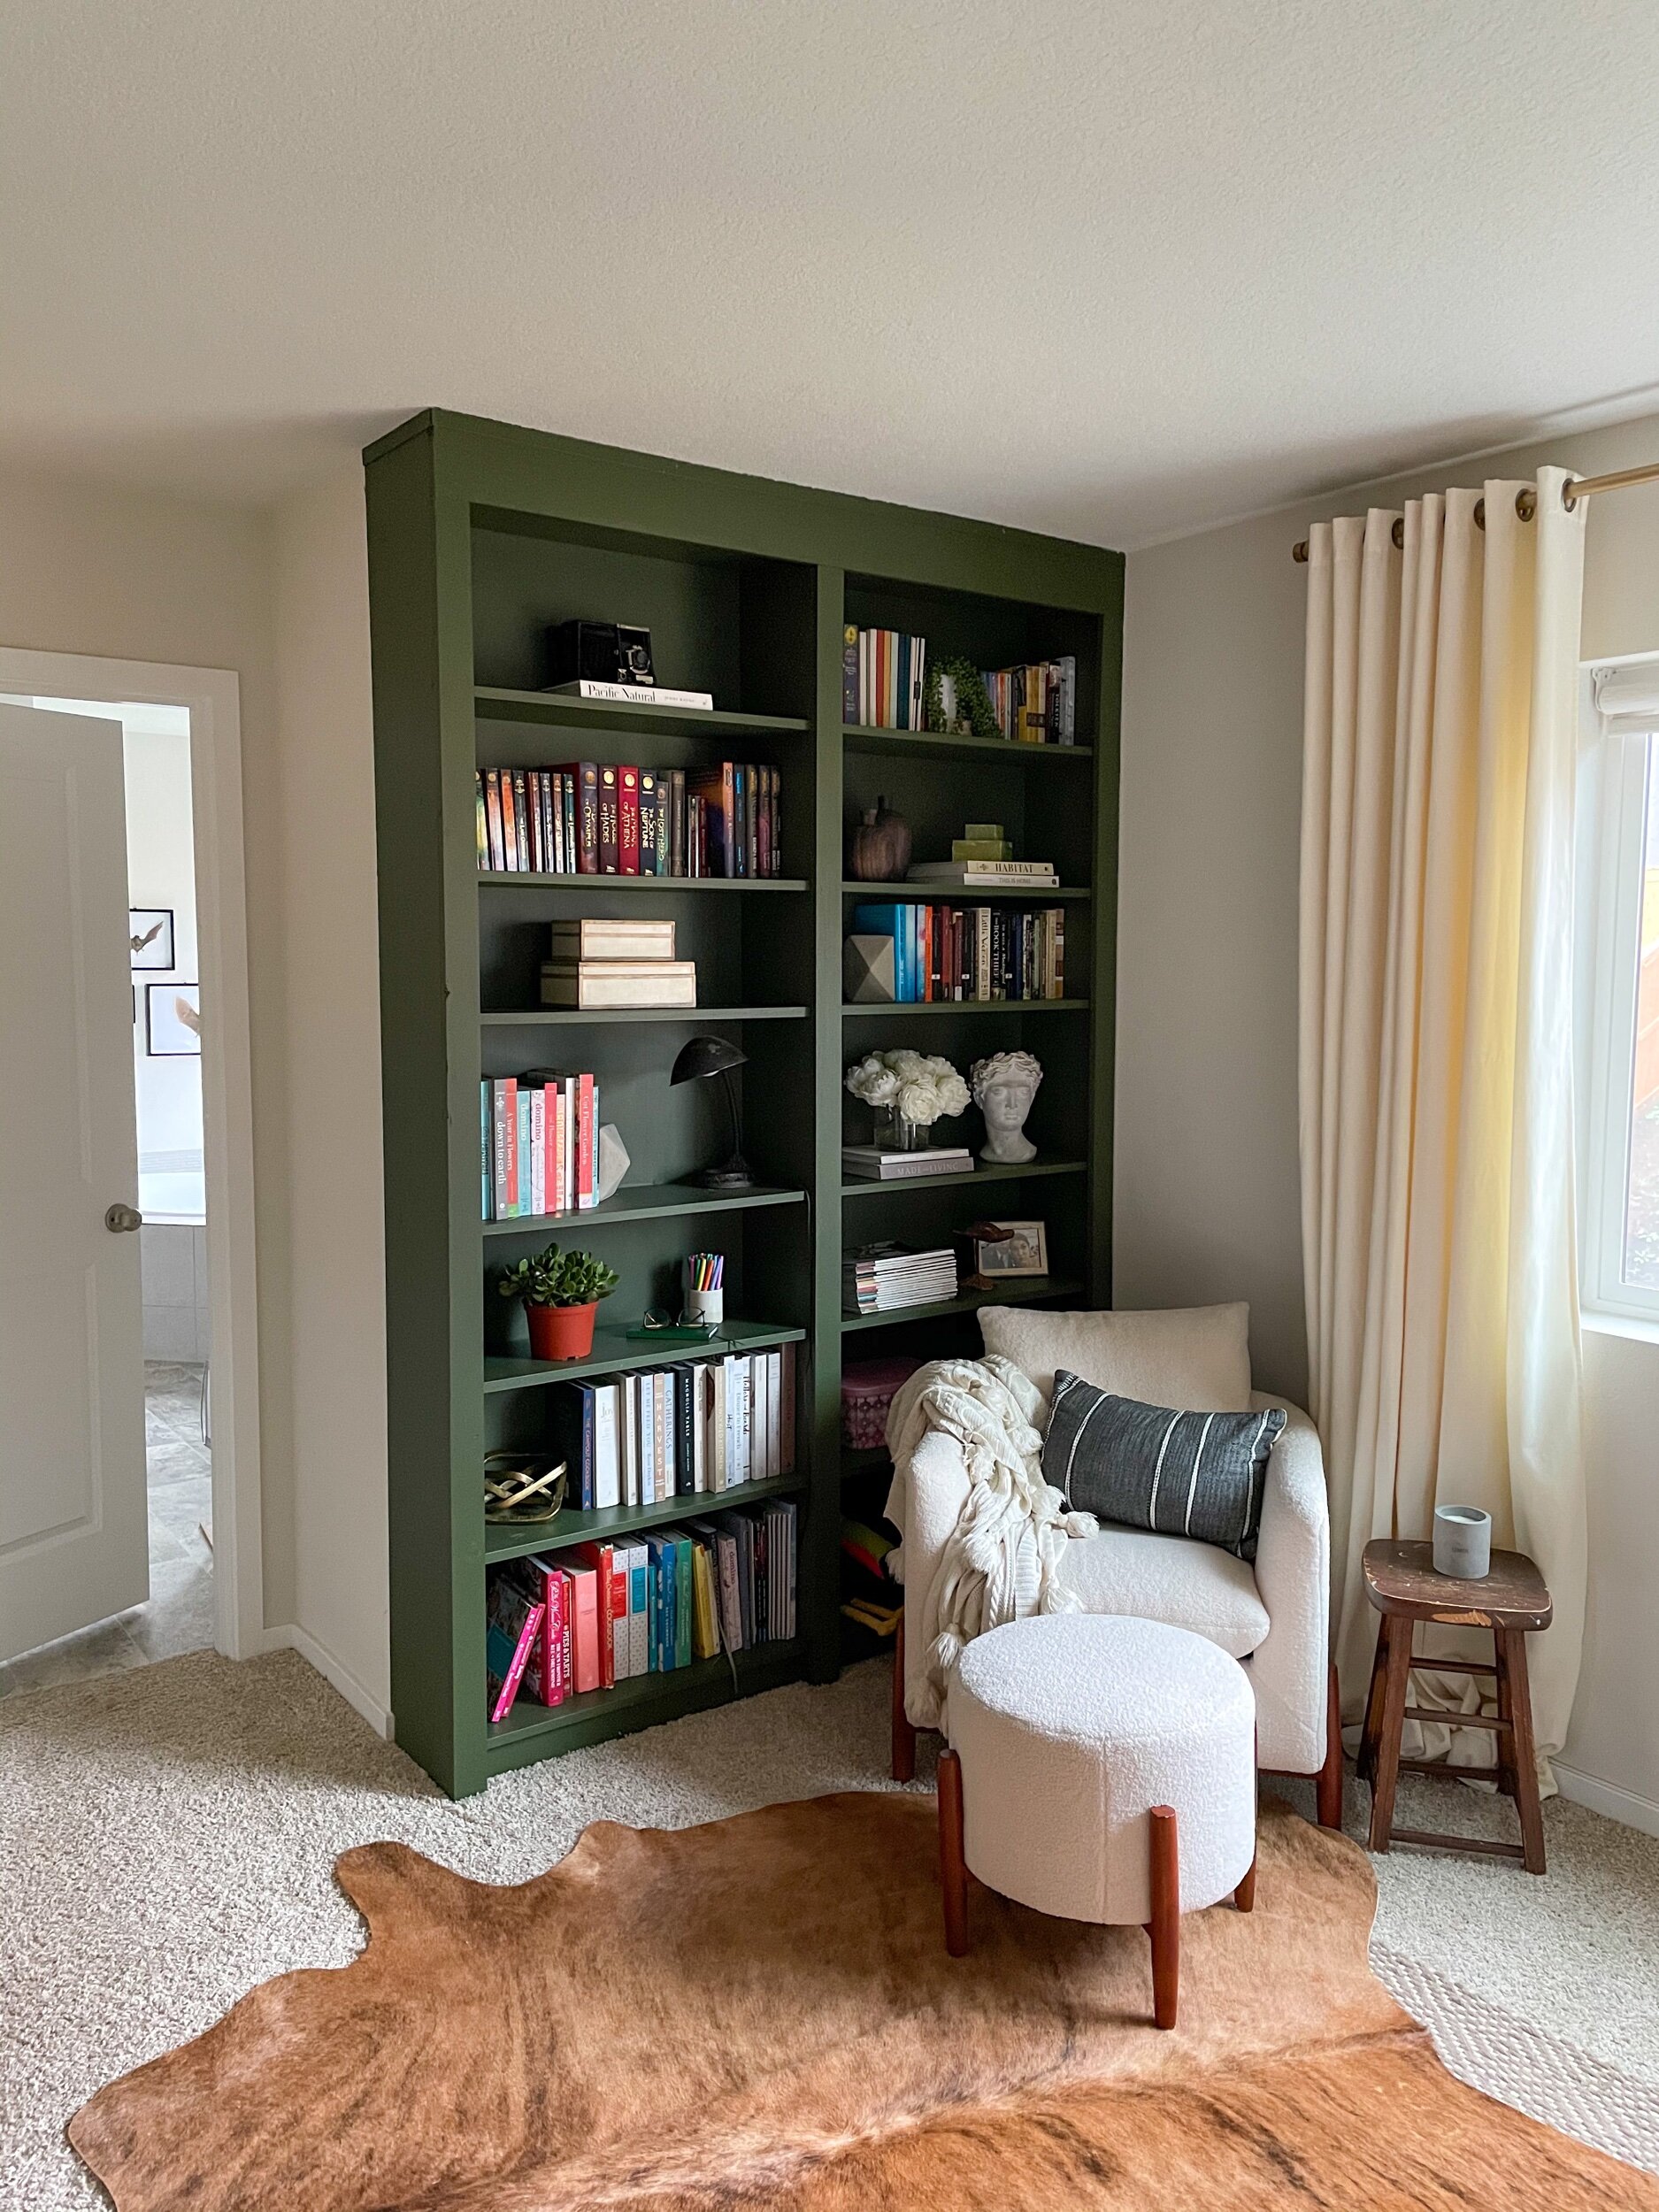
When I was a little girl, I dreamed of having a house with its very own library — A place where I could hide away and embark on adventures in many different worlds without ever leaving my home. Now that I’m grown up, I still secretly wish for a library in my home. Unfortunately, my budget doesn’t allow for it. However, I wasn’t about to let silly practicality and financial constraints stop me from enjoying a small piece of that childhood dream. I’m excited to share my IKEA Billy Bookcase built-in hack with you.
Please note that this is not a sponsored post; some links may contain affiliate links. If you purchase through one of my links (at no additional cost to you), I may earn a small commission. Thank you so much for your support!
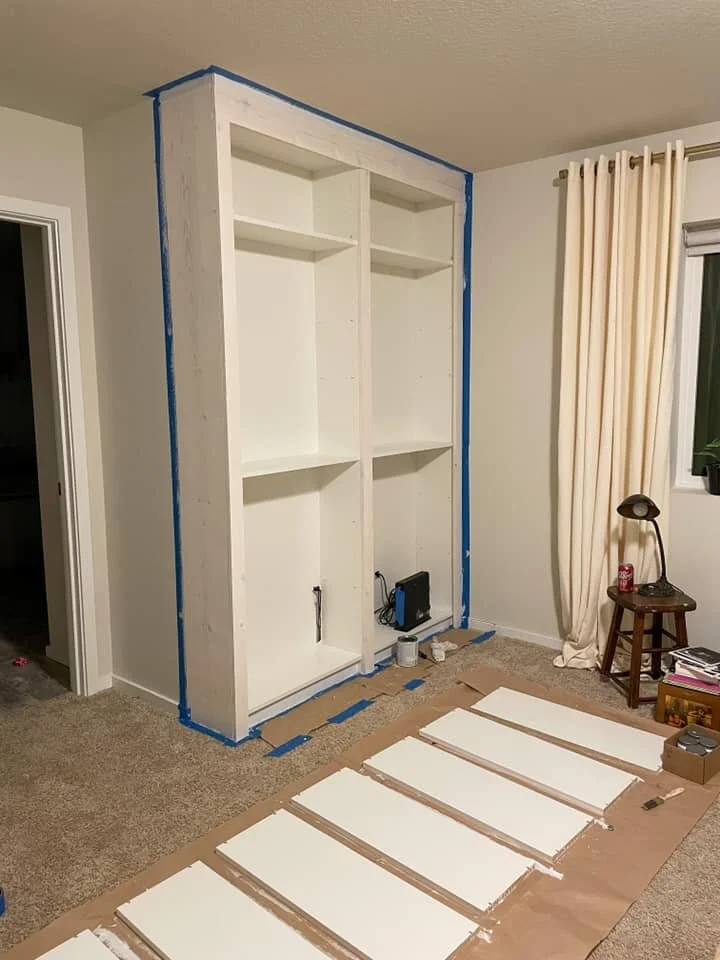
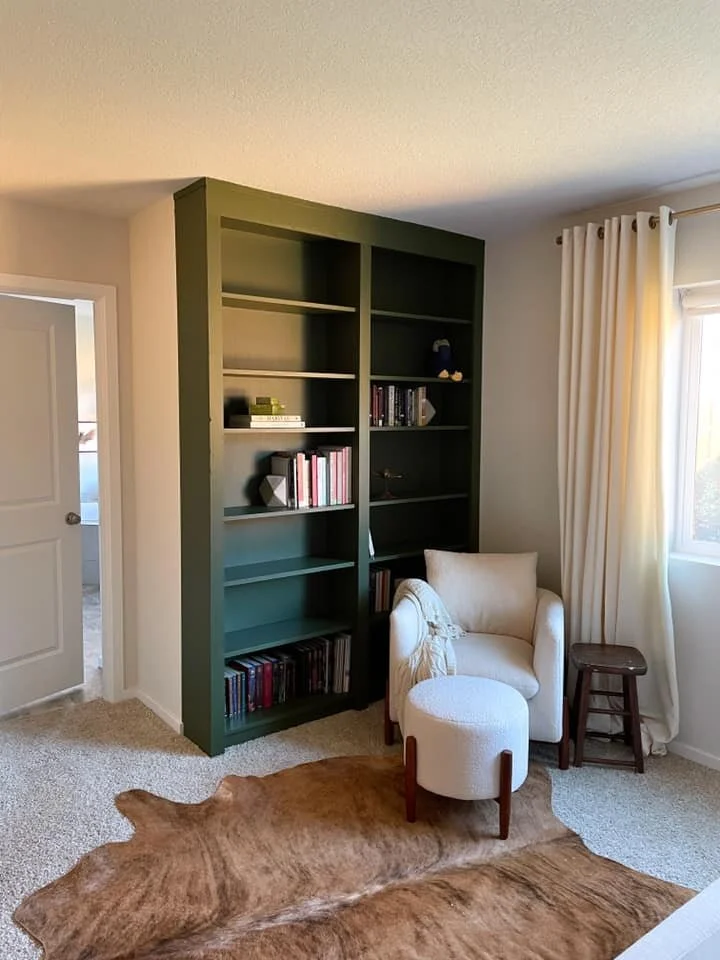
If you have been following along with the projects I am slowly completing around our new house, you have probably already seen the original plan for my primary bedroom. If you haven’t, you can read it here. Guys, don’t hate me, but I went rogue… I felt a call to go bold. To enter a new frontier where my usual neutrals are complemented with richer colors. As a designer, I see many lovely things and colors all day. At home, I usually need a space that gives my eyes (and brain) a rest. I decided to break the mold and invite my favorite deep green into our new home inspired by the surrounding landscape! Here is where we started.
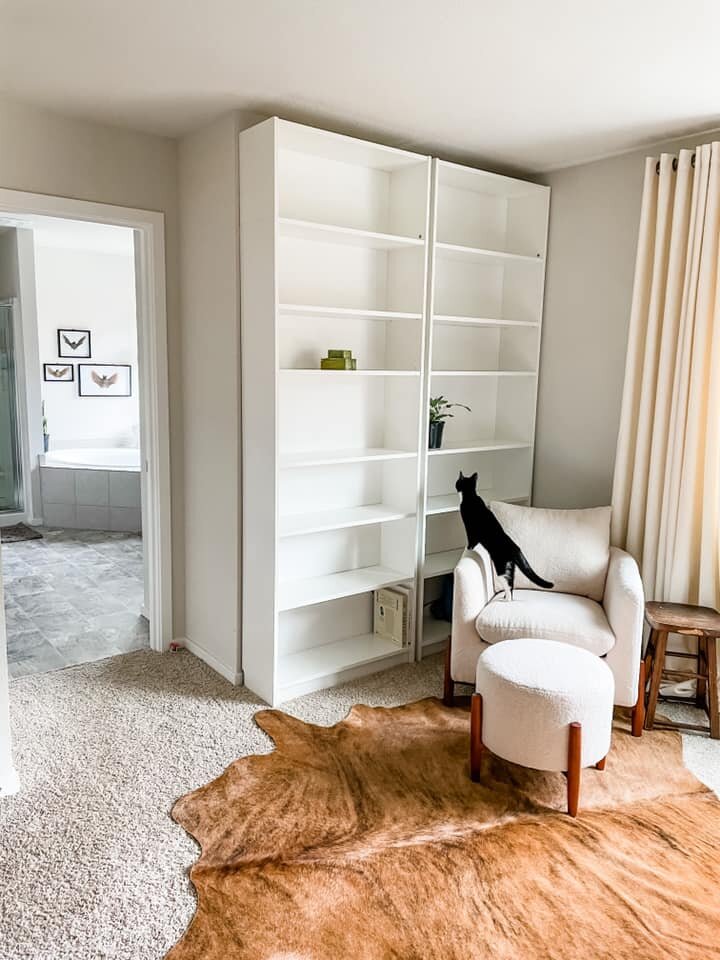
I purchased two Ikea Billy Bookcases with extensions to take full advantage of our ceiling height.

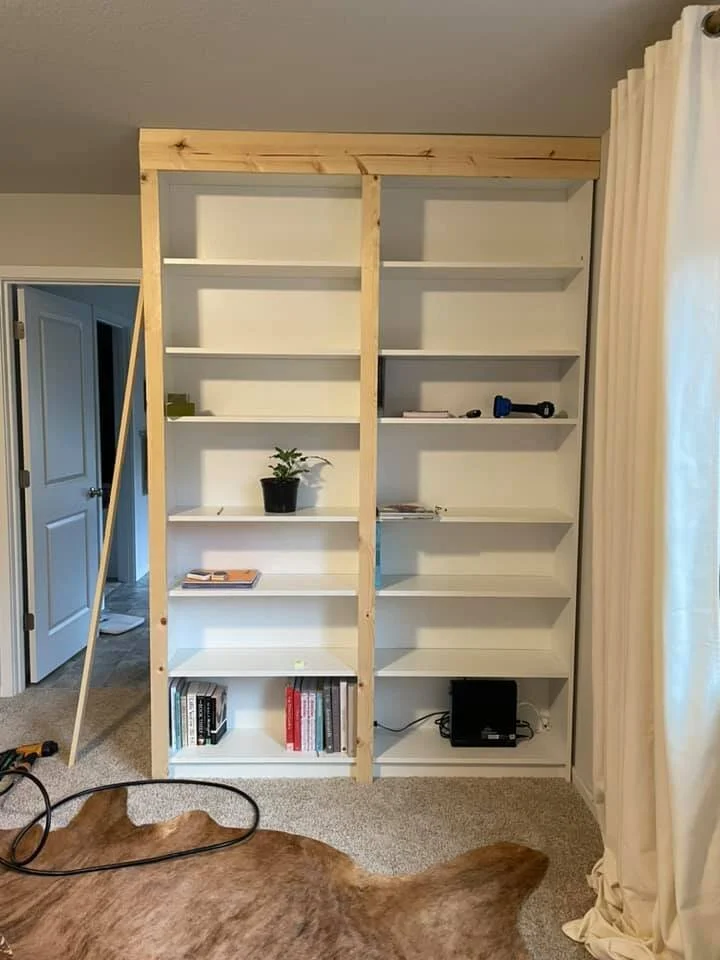
After securing the bookcases, I trimmed them out with a 1x6 for the top header (I hope to add two picture lights here later), three 1x3s for the vertical trim, one 1x12 on the exposed side of the bookcase, and a small, flexible flat trim for the top to close any gaps.

I used my nail gun to attach the trim directly to the bookcases. If you are attaching directly to the bookcases like me, be sure to use the correct length of nails, or you will pierce right through the bookcase, leaving some damage behind. I found out the hard way…
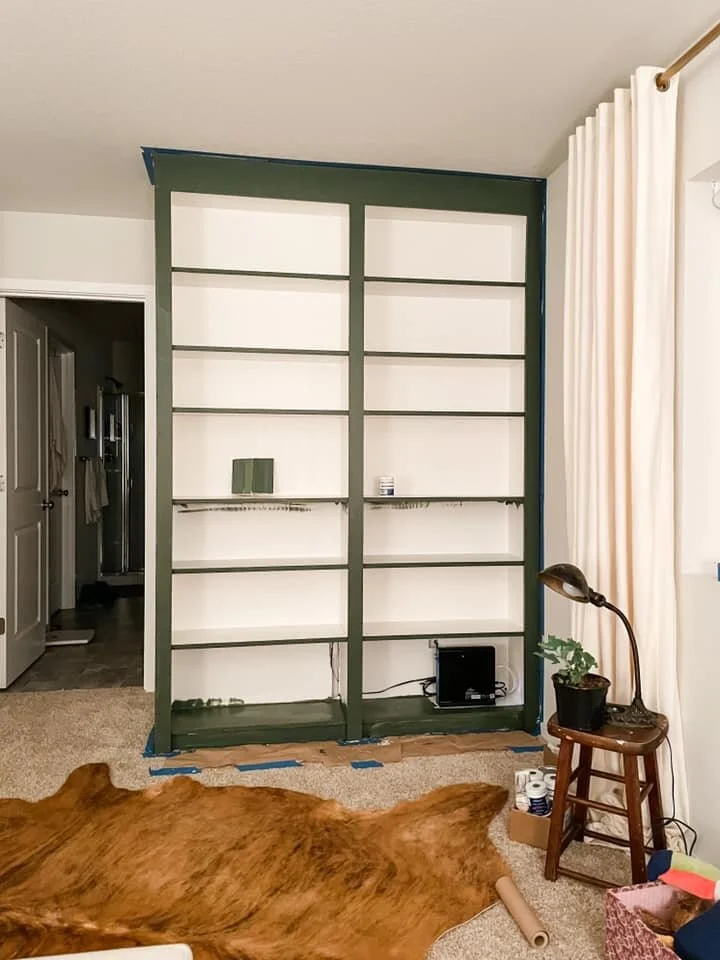
I used this primer to skip the step of lightly sanding the bookcases before the primer and paint. It worked well. If you want a smooth and durable finish, don’t skip the curing for 24-48 hours step. A quick tip I wish I had known: tape off the shelving sides. If you don’t and paint drips down them, you will have difficulty fitting them back into the bookcase. You can avoid this by keeping the shelves in the bookcase before painting. I wanted to be able to adjust the shelves later on and not worry about missing paint, so I removed mine before painting.
Shop The Post


After testing out many different green paints (8 to be exact), Sherwin Williams’ Secret Garden won. I love the deep green hue that feels fresh and classic. It gives me the same vibe I get from seeing fresh-cut flowers and greenery in my home! This color has a low LRV, but it doesn’t feel dull. I choose to use my go-to HGTV HOME by Sherwin-Williams Showcase Ultra White Eggshell Interior Paint so it would have more of a matte finish vs a glossy finish. Satin is another excellent option with just a little sheen!
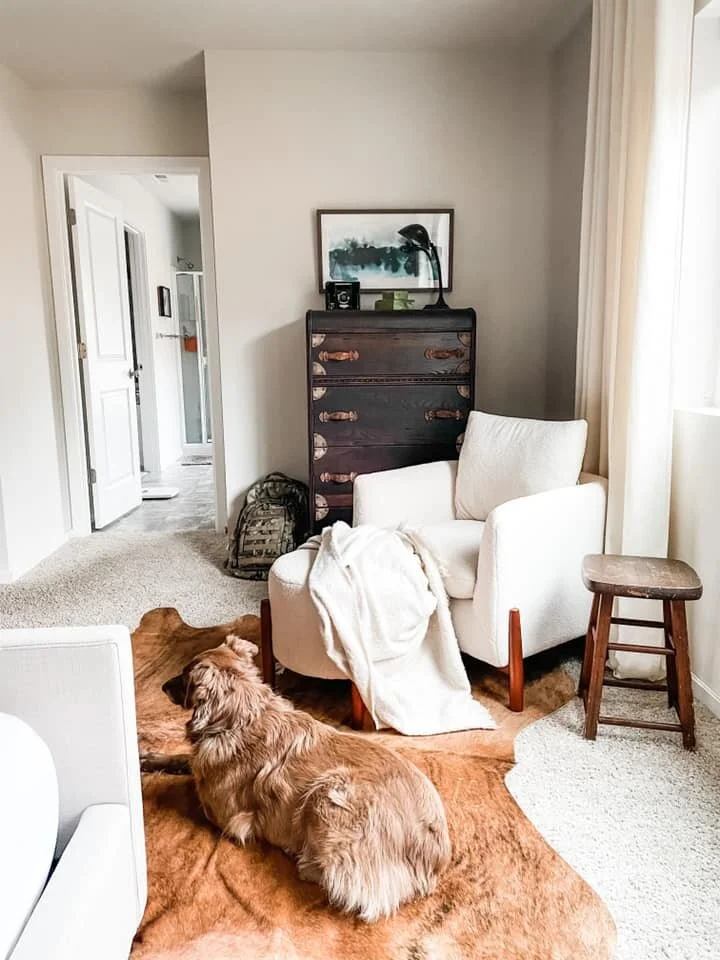
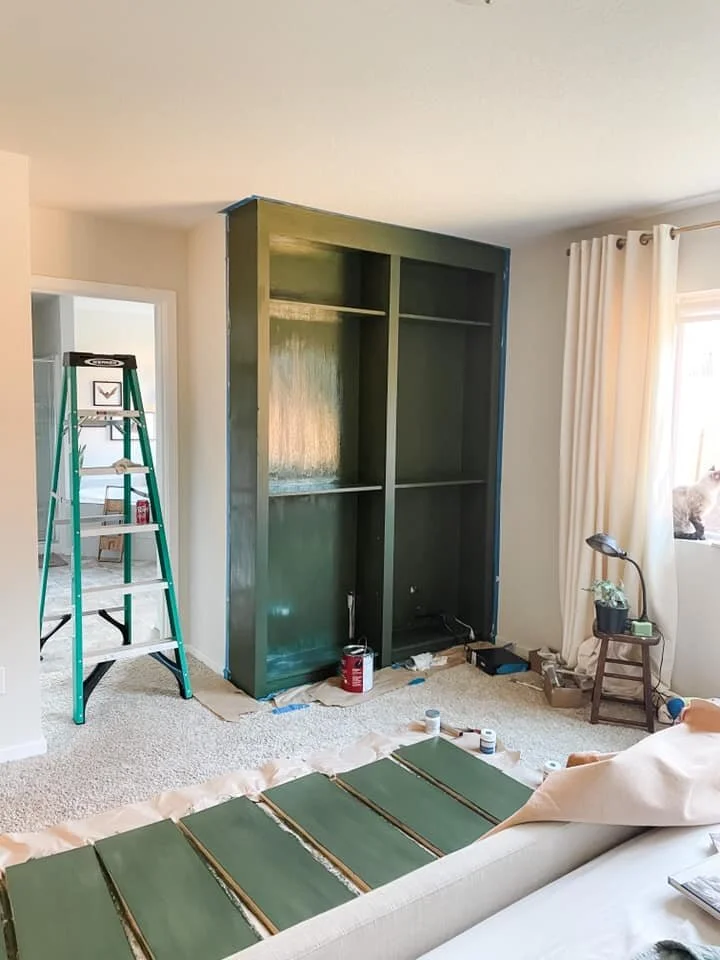
I noticed this color can take on more of an avocado hue in bright, direct sunlight (see the image below). Be wary when using this color in a bright area of your home. The results are just as I had imagined! Although I loathe painting, it was worth the effort and multiple trips to the paint store to find the perfect green. Check out my other post about my favorite green paints here!

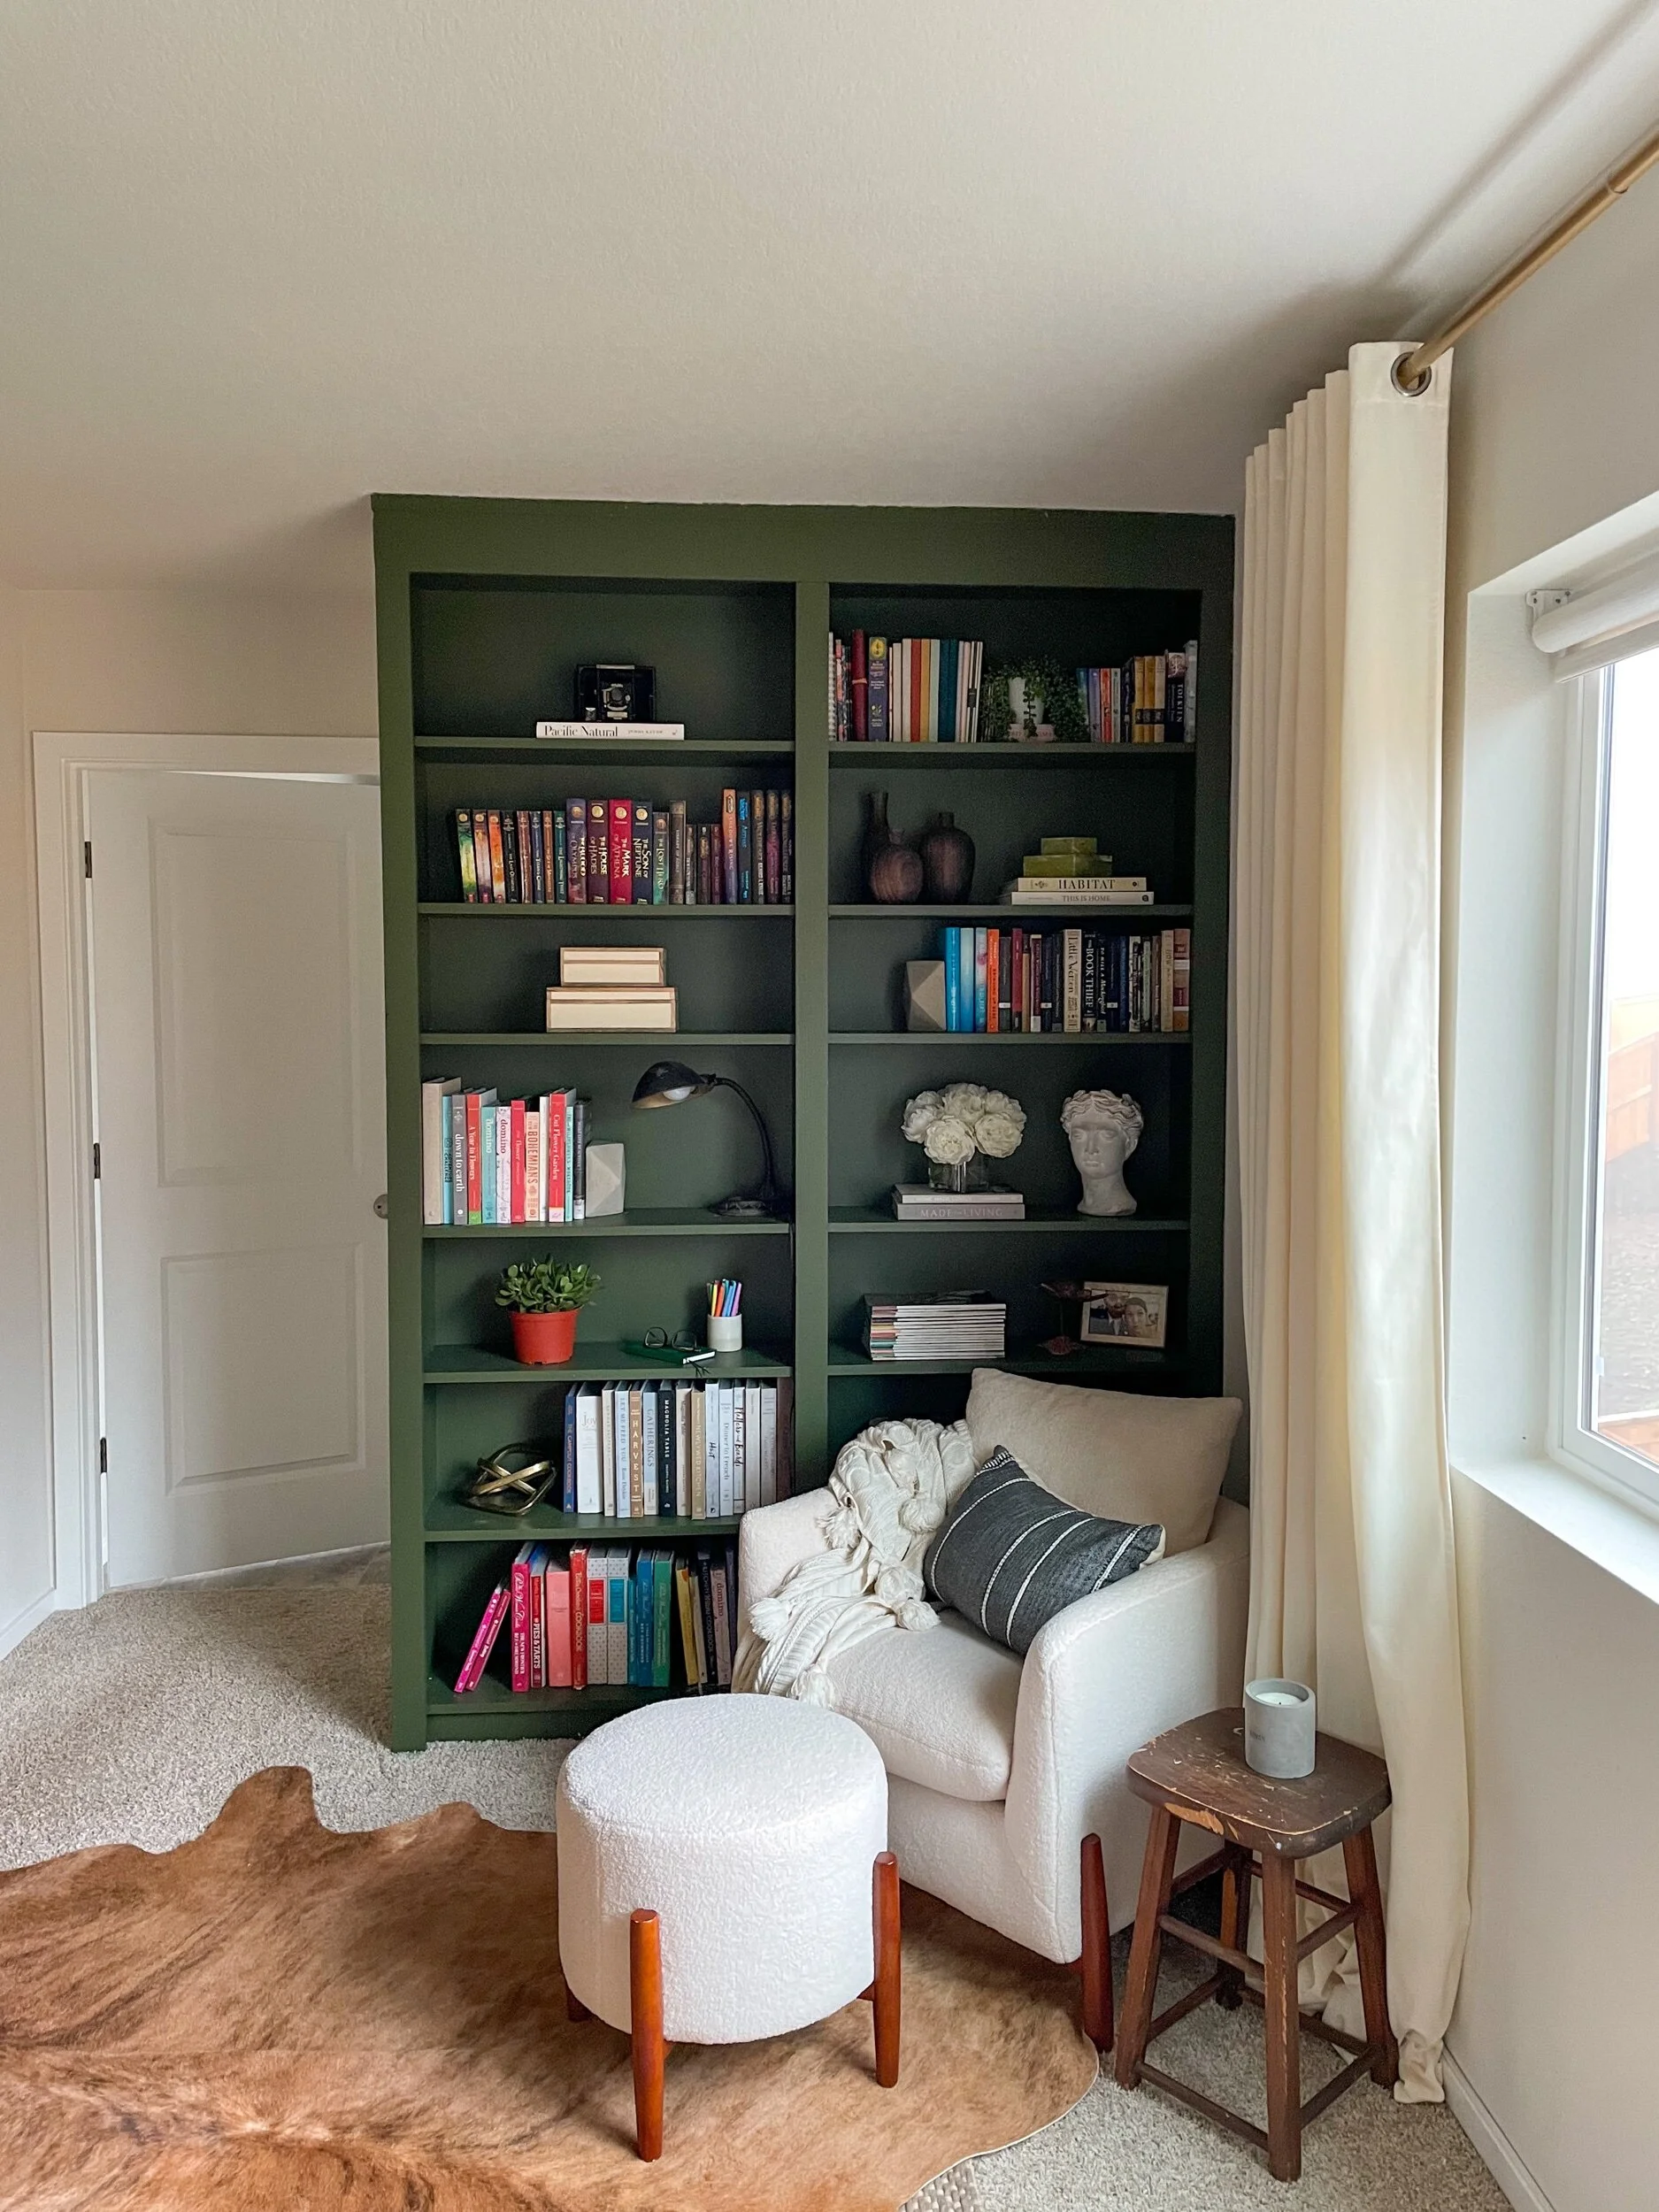
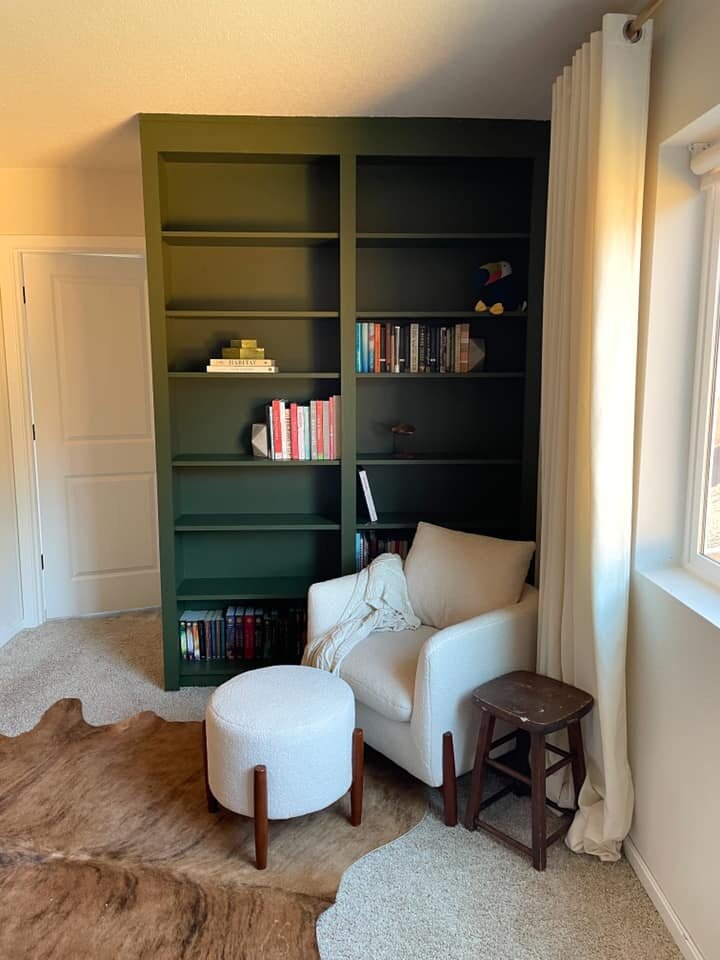
I can't wait to fill these shelves with more books and recoup the book collection I lost during the move. It will be a true mini-library, and I couldn’t be happier. I am so glad I took a risk and chose green for the bookcase!

#SWCOLORLOVE

Update
Follow me on the LIKEtoKNOW.it shopping app to get the product details for this look and others http://liketk.it/36LGC
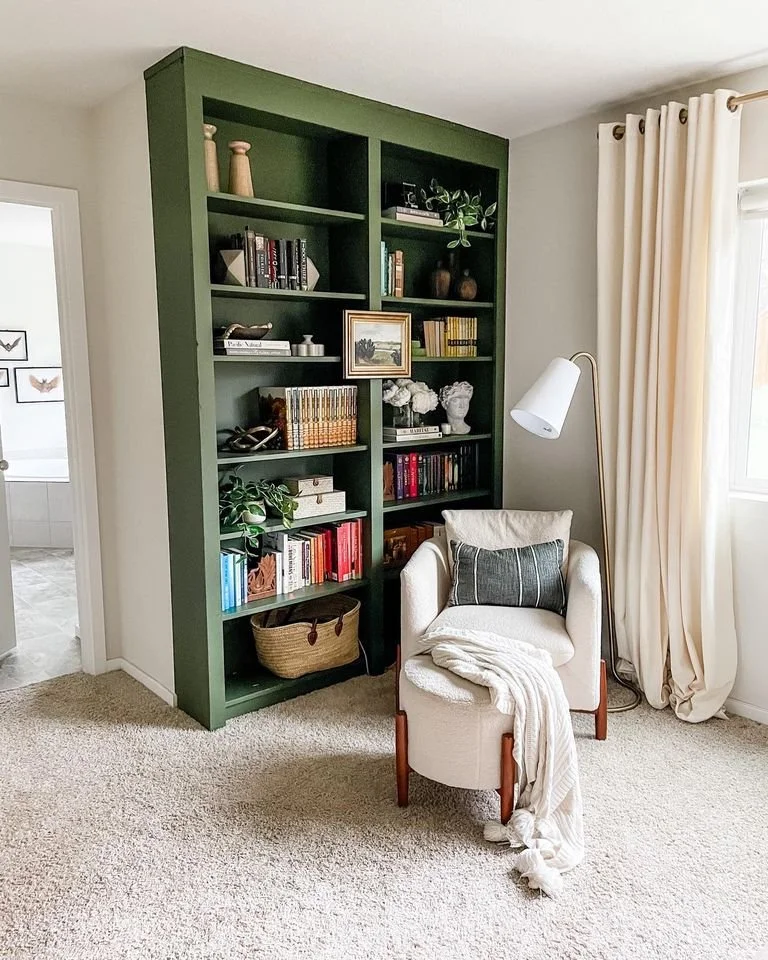
A year later, the bookcase is still looking sharp!
See the bookcase updated with wireless picture lights here.
Do you have any design questions? Please send me a message or leave your question in the comments for a chance to get it answered in a blog post. For more inspiration, check out my Pinterest page.
ONE MORE THING! IF YOU LIKE THIS POST, LEAVE ME A COMMENT AND/OR A QUESTION. I LOVE TO HEAR FROM YOU AND GET TO KNOW YOU A LITTLE BIT MORE WITH EACH AND EVERY COMMENT.
HAVE YOU TRIED SOMETHING I SHARED? I’D LOVE TO SEE IT! JUST TAG ME ON INSTAGRAM OR USE MY HASHTAG #ABIGAILAMIRAHOME SO I CAN SEE WHAT YOU’RE UP TO!
